Showing posts with label homemade. Show all posts

Sunday, July 28, 2013

Naturally Radiant Skin Care: How to treat yourself to a complete herbal facial!


Once a month treat yourself to a luxurious herbal facial!

Step 1: Cleansing Grains - For the recipe see this post.
Gently cleanse, exfoliate, and nourish your skin with cleansing grains.  Mix 1/2 tsp of grains with water to form a paste and gently massage into your skin, then rinse with warm water.

Step 2: Herbal Facial Steam - For the recipe see this post.

Boil several cups of water in a large pot.  Add 1/4 cup of herbs, cover and simmer for a minute or two, then remove from heat.  Place at a level you can comfortably sit and lean over the pot.  Cover your head and the pot with a towel, breathe in the delicious aroma, and let your pores open and drink in the nourishing plant oils for 5 - 8 minutes. Follow with a cold water rinse.

Step 3: Mask

Try a clay (white, green, rhassoul, bentonite), or raid your kitchen for honey, avocado, banana, yogurt, turmeric and oatmeal, etc.  Be creative!  Mix something up, leave it on until dry, then rinse with warm water.

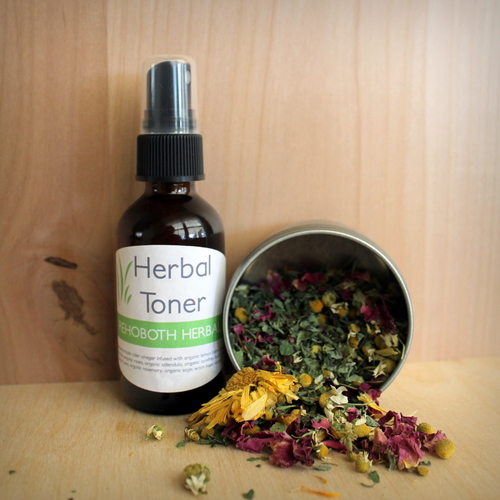
Step 4: Herbal Toner - For the recipe see this post.
Herbal toner/astringent is used after cleansing to remove all traces of dirt and oil, tighten pores, balance pH, and prepare skin for moisturizing.

Step 5: Moisturizing Oil - For the recipe see this post.
It may seem counter-intuitive to put oil on your skin, but moisturizing with gentle, nourishing oils will most likely make your skin very happy.  Use oils that are lightweight, non-greasy, quick absorbing and luxuriously nourishing and healing.  Dispense 4-5 drops into hand, rub hands together and gently massage oil into skin.

Here's an awkward bathroom selfie so you can see what my skin looks like after an herbal facial.   


If you're wondering where to get these ingredients, Mountain Rose Herbs sells high quality herbs and other products, and they are a fair trade company.  (Full disclosure, I do receive a small commission if you click the links on my blog and complete a purchase.)

If you're not a DIY-er, or you're not up for a another project right now, I do have these products available for purchase in my store.


This post shared at Frugally Sustainable's Frugal Days, Sustainable Ways #83

For educational purposes only. This information has not been evaluated by the Food and Drug Administration.  This information is not intended to diagnose, treat, cure, or prevent any disease.

Saturday, July 6, 2013

Naturally Radiant Skin Care - Make Your Own Moisturizing Oil


Everybody knows that "moisture is the essence of wetness, and wetness is the essence of beauty."  Name that movie.  Hint: mer-MAN! 

Now that you know how to naturally cleanse, tone, and deep clean your pores with an herbal steam, it's time to learn about the final step in a natural skin care system - moisturization.

When I first entered the world of homemade moisturizers, I tried lotions (or emulsions) and had pretty good success.  An emulsion is mixing two or more liquids together that don't like to be mixed together - like oil and water, for example.  Most emulsions are made with an emulsifier to make the process easier - commonly soy lecithin or even borax.  Emulsifiers aren't absolutely necessary, however, and I never used them. The process of emulsification is basically slowly pouring water into a combination of oils and melted beeswax while mixing with a blender or stick blender.  If you've ever tried to make homemade mayonnaise, it's like that.

The first homemade moisturizer I tried was a simple olive oil, beeswax, and water emulsion with some lavender essential oil so it didn't smell so olive-y.  It was simple and it worked well enough, but it tended to separate and left my skin feeling pretty greasy.

The second homemade moisturizer I tried was Frugally Sustainable's Non-Greasy Moisturizing Lotion.  It also worked quite well and didn't separate as much, but still left my skin feeling slightly greasy.  After I applied my translucent face powder, though, it balanced out and I felt like I had the perfect dewy glow.

Now after reading this blog post, I'm using moisturizing oil, and it's my favorite option so far!  It has several advantages over the emulsions.  First, you don't have to emulsify anything or worry about it separating later.  Second, you don't have to worry about refrigerating it or the water making the whole concoction go bad.  Third, I've actually found my skin to be less greasy after using only oil.  In fact, I think my skin feels like velvet after I use it, and once again, after I use my translucent face powder I have the perfect combination of velvety softness and dewy glow.

Moisturizing Oil is also great because it has several other uses.  It makes a great all natural eye makeup remover, a smoothing hair serum, and can even be added to homemade shampoo for extra moisturizing power. 

So, using oil as a moisturizer can be as simple as using one oil alone like grapeseed or jojoba (pronounced ho-HO-ba).  Both of these are lightweight, non-greasy, fast absorbing oils that mimic the sebum your skin naturally produces.  They are also both relatively inexpensive.  There are many other oils, however, that have extra age-fighting, dryness-combating, oil-cutting, or acne-busting properties, so I combined several oils to get the best of all worlds.

I used grapeseed and jojoba as a base and added in smaller amounts of several other oils.  Finally I added several drops of skin-loving essential oils.

Note: Never use oil on un-cleansed skin.  It can trap the dirt and oil in your pores, causing future unpleasantness.

Another note: A very little goes a long way.  If your skin feels greasy, you've used too much.  I keep mine in a dropper bottle, and about 4-5 drops is all you need.  This also means you get a lot of bang for your buck.


 Carrier oils good for dry or aging skin:
  • Grapeseed
  • Jojoba
  • Argan
  • Apricot Kernel (which smells scrumptious, by the way)
  • Avocado
  • Macadamia Nut
  • Sweet Almond
  • Hemp Seed
  • Sea Buckthorn (can temporarily stain skin, so use in small amounts)
  • Rosehip Seed (which goes rancid easily and should be kept refrigerated)
  • Emu
  • Vitamin E
 
Essential oils good for dry or aging skin:
  • Frankincense
  • Rose geranium
  • Rose
  • Cedarwood
  • Palmarosa
  • Roman Chamomile
 
 
Carrier oils good for oily or acne prone skin:
  • Grapeseed
  • Jojoba
  • Argan
  • Hazelnut
  • Sunflower
  • Tamanu
  • Sweet Almond
  • Hemp Seed
  • Borage Seed
  • Evening Primrose
  • Neem
  • Turmeric oil
  • Vitamin E oil
 
Essential oils good for oily or acne prone skin:
  • Lavender 
  • Peppermint
  • Lemongrass
  • Rosemary
  • Sweet basil
  • Bergamot
  • Tea Tree
  • Lemon
  • Juniper Berry
  • Roman Chamomile
  • Rose
  • Palmarosa
 
Mountain Rose Herbs is a great resource to learn more about the individual properties of these oils.  It's also a great place to purchase ingredients. They sell high quality organic herbs and other products, and they are a fair trade company.  (Full disclosure, I do receive a small commission if you click the links on my blog and complete a purchase.)

If you're not a DIY-er, or you're not up for a another project right now, I do have moisturizing oils available for purchase in my store.


For educational purposes only. This information has not been evaluated by the Food and Drug Administration.  This information is not intended to diagnose, treat, cure, or prevent any disease.


Monday, June 17, 2013

Naturally Radiant Skin Care - How To Make an Herbal Toner

I mentioned in my last post about cleansing grains that I recently celebrated my thirty fifth birthday, but I feel like my skin has never looked better.  I attribute this to switching to homemade products made with natural, high quality ingredients.  I never had really bad skin, but I never would have said I had really good skin either.  I was constantly battling a blemish or six.  Now I rarely get blemishes anymore, my skin is smoother, my complexion is clearer and brighter, and I'm wearing less makeup than ever before.  Most days I skip foundation and concealer entirely and just use a bit of my homemade translucent face powder.

Part of my new skin care regimen is an herbal toner or astringent.  An astringent substance is something that shrinks or constricts body tissues.  In facial care, toners or astringents are used after cleansing to remove all traces of dirt and oil, tighten pores, balance pH, and prepare skin for moisturizing.

Many herbs have astringent properties.
  • lemon balm
  • chamomile
  • roses
  • calendula
  • comfrey leaf
  • lemon peel
  • rosemary  
  • sage
  • peppermint
  • yarrow
  • lavender
I used a formula found in Rosemary Gladstar's Herbal Recipes For Vibrant Health, so I won't share it here.  If you're interested, feel free to look it up.  I've found this book to be a good resource.  If you'd like to experiment with your own formula, any of the herbs listed above will be effective.

When you've come up with an herb mixture you'd like to try,  then you will make a tincture.

1. Fill a wide mouth mason jar about 1/2 to 3/4 full with herb mixture.  If using dried herbs, keep in mind that the herbs will swell when liquid is added, so be sure to leave enough room.
2. Cover the herbs by about 2 inches with apple cider vinegar (organic, raw ACV is ideal) or witch hazel.
3.  Place the lid on the jar and shake.
4.  Put the jar in a warm location, a sunny window is a good spot, and steep for 2 - 4 weeks, shaking at least once daily.

5.  Strain the mixture through a fine mesh sieve lined with cheesecloth.  Squeeze the cheesecloth to get out all the herby goodness you can.

6.  You want your final ratio to be about 1/2 to 1 part vinegar to 1 part witch hazel, so if you tinctured in witch hazel, add vinegar.  If you tinctured in vinegar, add witch hazel.  If you don't have witch hazel, add distilled water. 
7.  Add skin loving essential oils like lavender, rose geranium, palmarosa, or carrot seed, if desired.  If you have oily skin, rosemary and peppermint are good options.
8.  Hydrosols like rose or lavender can also be added or substituted.
9.  Label and date the bottle.
 
Toner should stay good for up to a year.  Keeping it from heat and light will prolong its life.

If you're wondering where to get these ingredients, Mountain Rose Herbs sells high quality herbs and other products, and they are a fair trade company.  (Full disclosure, I do receive a small commission if you click the links on my blog and complete a purchase.)

If you're not a DIY-er, or you're not up for a another project right now, I do have herbal toner available for purchase in my store.


This post shared at Frugally Sustainable's Frugal Days, Sustainable Ways #78, Sunny Simple Monday, Monday Funday, and
From The Farm Blog HopMore the Merrier Monday


For educational purposes only. This information has not been evaluated by the Food and Drug Administration.  This information is not intended to diagnose, treat, cure, or prevent any disease.


Bulk organic herbs, spices and essential oils. Sin


Sunday, June 16, 2013

Naturally Radiant Skin Care - A Recipe For Cleansing Grains

I recently celebrated my *cough* thirty fifth *mumble* birthday.  The ironic thing is, I honestly feel like my skin has never looked better.  It's not so much about what age I look (people have guessed my age as younger for years) but my skin is clearer, smoother, brighter, and more radiant than it has ever been before.  I believe it's because I have switched to natural products that I make myself from high quality, organic ingredients.

When I think back to all the times I spent in the department store aisle mentally agonizing over which of the myriad brands or products contained the silver bullet that would put a stop to my breakouts and dry skin, I can only shake my head.  The answer is none of them!  I used to think that companies had teams of scientists whose purpose in life was to figure out how to make my skin miraculously better.  Now I realize that, more accurately, they have teams of marketers whose jobs are to more effectively part me from my money in exchange for what are mostly cheap, harsh, synthetic fillers and preservatives whose names I can't even pronounce. 


How was it ever okay to unquestioningly rub that on my face?  I get frustrated with my former self, but these days I try not to put anything on my body that I can't pronounce or wouldn't put in my mouth.  Now I alternate between two natural skin cleansers that I love.

The first is soap.  Real soap.  Not Dove bars or any other kind of soap free bar.  I've used my own homemade soap, Grandma's Lye Soap, and Dr. Bronner's Castile soap in bar form, and I've been happy with all of them.  In fact, since switching to real soap, my skin is better head to toe.  The thing to be careful about when shopping for soap, though, is to watch out for synthetic fragrances.  Many soaps are made with fragrance oils that are not so good for us.

Soap is particularly good for deeper cleansing and makeup removal, but now I mostly use cleansing grains.  The advantage of cleansing grains is that they not only cleanse, but they nourish and exfoliate as well.  It's like a healthy meal for your face!  This recipe is based on a recipe in Rosemary Gladstar's Herbal Recipes For Vibrant Health.


The formula:

16 parts white clay
8 parts finely ground oats
2 parts finely ground almonds
1 part finely ground lavender
1 part finely ground roses
1 part rice powder (I use organic brown rice baby cereal)


The breakdown:

White clay or kaolin clay is the mildest of all clays and is suitable for sensitive skin. It helps stimulate circulation to the skin while gently exfoliating and cleansing it. It does not draw oils from the skin, so it can also be used on dry skin types without negative results.

Oats and almonds nourish and exfoliate.  Oats are also emollient, helping to soothe and moisturize the skin.

Lavender and roses have mild astringent properties that tighten and tone skin, and the plant oils contain antioxidants and are commonly believed to have regenerative properties.  Lavender is antimicrobial, helping to clean the skin.

Rice enzymes smooth skin and accelerate cell renewal.


To use, simply mix about 1/2 tsp with water and gently massage into your skin, then rinse with warm water.  Grains may also be used as a mask by mixing with milk, honey, yogurt, or a liquid of your choice and leaving on for several minutes.  I keep mine in a spice bottle with a shaker top in the shower, and I find that it's super convenient that way.

The beauty of making your own products is that you know everything that goes in them, you control the quality of the ingredients, and you can customize them to suit your individual needs.  There's not necessarily anything magic about this particular formula.  Use ingredients you have on hand, substitute or experiment with additions like cornmeal, poppy or chia seeds, seaweeds or other herbs.

If you're wondering where to get these ingredients, Mountain Rose Herbs sells high quality herbs and other products, and they are a fair trade company.  (Full disclosure, I do receive a small commission if you click the links on my blog and complete a purchase.)

If you're not a DIY-er, or you're not up for a another project right now, I do have these cleansing grains available for purchase in my store.

What about you?  What do you use to naturally cleanse your skin?


For educational purposes only. This information has not been evaluated by the Food and Drug Administration.  This information is not intended to diagnose, treat, cure, or prevent any disease.


 This post shared at: frugallysustainable.com's Frugal Days, Sustainable Ways #77, and  


From The Farm Blog HopMore the Merrier Monday


Bulk organic herbs, spices and essential oils. Sin

Tuesday, May 28, 2013

Locks Au Naturale - A Simpler, Easier and More Frugal Shampoo Update

Okay.  Back to hair.  I posted awhile back about 'poo cubes and other natural shampoo methods I've tried.  Now I'm going to tell you to forget allllll about them.  I've found something even simpler and easier that I like even better!

I took another blogger's word for it that castile soap alone would not lather nicely, which is why I came up with the 'poo cubes.  Then one day I ran out of cubes, and I was in a hurry, so I washed with just diluted castile, and...it lathered fantastically!!  Granted, she may have been using a different brand.  I've tried two kinds - Dr. Bronner's (available at Target) and Mountain Rose Herbs'.  The Dr. Bronner's works great for me.  I didn't prefer Mountain Rose Herbs' castile for shampoo, but it still works great for cleaning and other uses.

So, what's the formula, you ask?  I'm going to be very science-y and specific right now:

        some water and some castile soap

I don't measure.  I just pour.  The 'poo cube ratio was 1 part coconut milk to 4 parts castile, so I try to stay in the range of 25-50% water and 50-75% castile.

Straight castile was too much.  It actually seems to work better diluted.

You'll want to use distilled or at least filtered water for the best shelf life.

I have tried including a small amount of my facial moisturizing oil for extra moisturizing, and I liked it both ways.  You can experiment and see what works for you, but a tiny bit of jojoba oil might help with extra moisturizing if you tend toward dry hair...just be sure to shake well before using.  Essential oils would make a nice addition as well.  Rosemary is generally considered good for dark or graying hair and chamomile for lighter hair...or just whatever you would enjoy.  Here are some recipes for further customization, but I'm enjoying keeping it simple right now.

For conditioner, I'm sticking with the ACV (apple cider vinegar) rinse - one part ACV to four parts water.  I've adjusted how I use it though.  I pour a small amount over my scalp only and rinse right away.  My hair seems to be a little too fluffy and frizzy without the ACV rinse, but a little too flat and greasy if I use too much or leave it in too long.

Hair is about as unique as fingerprints, so it may take some time and experimenting to find what really works for you.  I'm glad I ran out of 'poo cubes and finally found something easy and simple.  I really used to miss yucky commercial shampoo and conditioner, but I'm glad I didn't give in and go back to it.  I'm happier with my hair now than I have been in a looong time.

Not to mention the savings!  A 32 oz. bottle of Dr. Bronner's retails for about $16.99.  After diluting it, I suspect that that amount could last at least the better part of a year, if not longer.  Great results for less money!  What are you waiting for?


This post shared at Frugally Sustainable's Frugal Days, Sustainable Ways #85


Bulk organic herbs, spices and essential oils. Sin

Friday, May 17, 2013

Big Blog Announcement

A new name and a new look, and a new store coming soon!

Why a new name?

I know I'm the one that chose it, but I was never thrilled with the original name.  Mostly I just wanted to get started blogging and I couldn't think of anything better and I didn't want to wait to start until I did think of something better.


Why Rehoboth?  

Rehoboth comes from a story in Genesis.  Isaac's herdsmen dig two wells and end up quarreling with other herdsmen about who they belong to.  They dig a third well and no one quarrels over it.  Isaac named it Rehoboth, saying, "Now the Lord has made room for us and we will be fruitful in the land."  When I read this passage about a year ago, I connected with it so strongly because it's precisely what my family is asking the Lord for.  This word has come to symbolize for me and sum up our family's vision to multi-generationally reconnect with the land.  If we name our farm, I'm sure we'll choose the name as a family, but I hope to call it Rehoboth.  In the meantime, Rehoboth is what I ask the Lord for (nearly) every day.


Why Herbal?

I have loved plants and gardening for many years now, but if you had asked me not so long ago what my opinion of herbal medicine was, I would have scoffed and put it in the box labeled weird/new age/hippie/folklore/waste of money.  As I started to become more interested in a more natural lifestyle, I read a sentence somewhere that stuck in my mind like a thorn.  "Why wouldn't God have given us everything we need?"  It's a good question, and in pondering it, I believe it's more likely that He did.  This is not to say that I don't believe in doctors and modern medicine or that I think any or all plants are miracle working wonders.  I do think that many Americans (myself included) have outsourced their health, are disconnected from creation, and too often medicated for profit.  I think there's a time and a place for each, and a balanced middle ground.  I think there are vast, untapped resources that God has given us, and I'm enjoying learning more about them.


Why a new look?

The new look is to go with the new name.


Why a store?

The idea for the store was an organic process, no pun intended.  I'm excited about the products I'm making and using, and in talking to other people I realized that many are interested in natural products but not as excited about making them.  I've mentioned before that I hope to someday earn a living from the farm, and this could be a stepping stone.  It could be a way for me to earn income from home while moving toward eventually transitioning out of my job, and someday maybe I'll grow my own herbs to use in my products!  I don't know what will happen, but this has become part of the adventure for me, and I'm excited to try.


Thank you to my many dear friends who have supported and encouraged me and my family through this process!!  I appreciate it more than you know.


Mountain Rose Herbs. A Herbs, Health & Harmony Com

Saturday, February 16, 2013

Locks au naturale - Homemade Hairspray

Homemade hairspray is easy peasy, and it works!  You may not be able achieve this look,


but that's probably for the best.


What you'll need: 

1 whole orange (for dark hair) or lemon (for light hair)
2 cups filtered or distilled water
1/4 cup rubbing alcohol or clear grain alcohol like vodka or gin
essential oils for scent

Cut the citrus fruit of your choice into wedges and boil with the water until it's reduced by half.  

Or, if you're like me, forget about it and boil it until the liquid is almost all gone, add some more and boil it again.  

Strain into a glass measuring cup and let cool.  If you have less than a cup of liquid, add water to make 1 cup.

Use a funnel to pour it into a spray bottle, add the alcohol and essential oils, and voila!


 Just kidding.  I am SO glad I didn't graduate from high school in 1988.


Anyway.  If you don't want to use the alcohol (it can be drying and is not without it's health concerns) you can omit it and store your hairspray in the fridge.  It should last for a couple weeks that way.  I don't use hairspray very often, so I added the alcohol and one batch has lasted me a good 6 months or more.  I used rubbing alcohol because it was what I had on hand, but I probably will try vodka next time to see if it is less drying.  

I use it when I put my hair up to help things stay in place and smooth flyaways, and and sometimes I use it along with a diffuser to help add volume and define my "curls" if I'm trying to look a little extra fancy.  Like most homemade, natural products it is not an exact replica of what you would buy at the store and there is a bit of an adjustment phase while you get to know the way the product works, but it's worth it to me to know how to pronounce everything I'm putting on my body.

What about you?  Have you ever made your own hair styling products?  Would you?


Saturday, February 9, 2013

Locks au naturale - Thirty Two Poo Cubes (say that five times fast!)


UPDATE: I am no longer using 'poo cubes.  I found something simpler, easier, and more frugal that I like even better!


 I apologize for my absence, I've had a little extra trouble keeping up with life the last few weeks.  Sigh.  Moving on.  In my last post I mentioned talking next about hair or skin care.  So I've decided to do a series on natural hair care, then natural skin care.  I am so. smart.

Natural hair care has probably been my biggest struggle.  It took me a year to find a replacement for commercial products that I'm truly happy with, but I'm grateful to report that I have indeed finally found something worth blogging about.  I shall recount my journey for you now.

1.  No 'poo.  No 'poo is crunchy blog slang for washing with a baking soda and water mix and rinsing with an ACV (apple cider vinegar) and water mix.  Tons of people rave about the results.  To be fair, I only tried this once or twice, and everyone says you have to give it time, but greasy hair is one of my "things," and since my hair looked worse after trying this method, I wasn't willing to give it any additional time.  I may try again at some point (if I ever quit my job and work at home), but for now I'm going to stick with what's working.

2.  'Poo bar.  I made my own and also tried a store bought version.  I really wanted to like it because I liked having only one product in the shower, and it was really easy to travel with.  I didn't love the texture of my hair, though, and my ends constantly looked dried out so I ended up trimming my hair more frequently than I wanted to.  I tried a diluted ACV rinse with the shampoo bar, but didn't like the results.  I also tried putting coconut oil on the ends of my hair regularly to combat the dryness, only resulting in really greasy looking ends after the first washing and really dry looking ends after the next.

Side note - Most commercial hair products contain silicone.  Translation: they coat your hair with plastic that disguises dryness and damage.  Anytime you switch from commercial products, your hair will most likely go through a transition/detox phase, and because it will no longer be coated with plastic, it may look dry for awhile.  You do have to give natural products time to really judge how they're working.  

3.   Store Bought 'Poo.  I gave the shampoo bars about 6 months and still had unacceptably dry ends, so I switched to Aubrey Organics.  It's the brand they sell through Mountain Rose Herbs, so I figured the ingredients would be trustworthy.  It was a step in the right direction, but I still definitely didn't love my hair.  Plus it's pricey, and the shampoo contains carrageenan, a natural preservative derived from seaweed, but not without its health concerns.  Just because something is natural doesn't mean it's good for you.  Do your research.  You can't see me, but I'm shaking my finger at you.

4.  'Poo Cubes.  I remembered reading this blog post over at Crunchy Betty about "sorta 'poo" at some point and mentally tucking it away for future reference in case my other options didn't pan out.  They didn't.  So I tried this, and WINNER!  I've been very pleased with the results.  My hair looks clean and shiny and feels soft with no dryness.  Here's a specific breakdown of exactly what sorta 'poo means.


Sorta 'poo is a mixture of 1 Tbsp. castile soap and 1 tsp. coconut milk.  Milk.  Not oil.  If you know my sister, you can ask her to tell you that story.  I make coconut milk myself with a blender, but you could probably use a store bought brand.  The thing that's tricky about this method is that coconut milk is perishable.  You can't whip up a big batch and leave it in your shower.  It will go bad.  Reading through the comments on the aforementioned blog post, one brilliant reader said that she froze coconut milk in teaspoon sizes so she could make a fresh batch of 'poo as needed.  Taking that one step further, I froze the castile and coconut milk together in measured amounts in an ice cube tray.  So now I have a sandwich bag in the freezer containing a bunch of little white 'poo cubes.  My hair is pretty long, but also thin and fine.  I found that I don't even need an entire cube, so I cut them all in half and still have more than enough per washing.  This method also turns out to be very economical.  Without doing the exact math, I was able to make 32 'poo cubes for less than $5, I'm sure.  I typically wash my hair 3 times a week, so one batch will last almost 3 months.  Maybe not as cheap as a .99 cent bottle of Suave (do those still exist?) but ~$20/year for shampoo is pretty durn good.

Admittedly, this method is not as convenient as having a big bottle of something in your shower, but I've adjusted.  If I remember the night before, I pull a cube out of the freezer, put it in a tiny glass jar, and let it thaw.  If I don't, I grab one in the morning and it melts quickly as you rub it in your hands.

Something else interesting about this method is that when I followed it with an ACV rinse, I actually liked the results this time.  Specifically, I use about 1 part ACV to 3 parts water and some essential oils to help it not smell so vinegary.  You can play with that ratio to fine tune the results.  The vinegar rinse is important because it helps balance the pH of your scalp after washing.  

So.  Hair is kinda like fingerprints, or snowflakes, or grass (always greener...).  Ultimately what works well for me may not work well for you, but here's a list of options to try, and hopefully your process will be speedier than mine was! 


Saturday, January 12, 2013

The cardinal rule of newbie pressure canning

With my Christmas money in hand and visions of a well-stocked pantry dancing in my head, I bought myself this bad boy:  an All-American 30 quart pressure canner.  I chose the All-American because it's made in the US and it's said that with proper care your grandchildren will be able to use it.  It also has very few negative customer reviews and a metal to metal seal with no rubber gasket to be replaced.  The 30 quart is the second largest model they sell and is supposed to can 19 pints or 14 quarts.  I reasoned that it would probably be best to can fewer larger batches than a lot of smaller ones. The largest model seemed to border on ridiculous (32 pints or 19 quarts.)

I've only canned once before: 6 half-pints of pickled jalapenos using the water bath method.  High acid foods like fruit or things pickled in vinegar can be canned this way, but low acid foods must be canned in a pressure canner.  It was a pretty successful venture, so I felt confident that I would be able to handle pressure canning as well.  I was wrong.  So very wrong.

The first time I used my pressure canner I learned a lot...the hard way.  I will now share my great wisdom with you in case you're ever inclined to try this yourself...or just for your amusement at my expense. 

Tip #1   Just because you CAN can 19 pints at once doesn't mean you newbie SHOULD.  Having one successful canning attempt under your belt and a ginormous canner does not qualify you to can 3 pounds of dry beans at once.  

Tip #2    DON'T newbie can alone.  If you are a seasoned canner, solo away, but for me an extra pair of hands (and an extra brain) would have been a big help.

Tip #3 (and this one is the most newbie important) DON'T BUY A PRESSURE CANNER THAT DOESN'T FIT UNDER YOUR RANGE HOOD.   If, for some reason you don't heed this first bit of advice, DON'T wait until your beans have been cooking for 2 hours, you have boiling water and lids ready to go, and your hot jars lined up on the counter to come to this realization.

Tip #4   DON'T newbie decide to hot pack your jars, then put them into cool water in your canner, close it up and carry your canner (which now weighs approximately the same amount as a healthy middle schooler) to your car and drive to your sister's house so you can use her stove.  You may find when you arrive at her house and open the lid to inspect the contents that a jar (thankfully only one) has fallen over (thankfully not broken) and the lid has come off so you now have beans floating in the water, all your carefully measured head space is no longer so carefully measured, and everything has cooled too much to continue without danger of later spoilage.  Then you might find yourself packing up, driving home and despairing of the mammoth mess you now have to clean up.  Cleaning up after a success isn't nearly as disheartening as cleaning up after a failure.

At least it wasn't a total waste.  I ended up pouring the beans back into the pot, cooking them for the rest of the day and freezing them.  Since we're trying to move out of this house and I'm increasingly interested in building my own tiny house, I think I'll keep the canner and just try future attempts at my sister's house or our church building.  Since it's my mistake, I'd have to pay to ship the behemoth back, anyway.  Unfortunately I didn't make a good first impression, but I trust that in the future my canner and I will become good friends!  I'll keep you apprised of our relationship.  : )

Next time I think I'll write about my hair or skin care routine, both of which I am finally thoroughly pleased with.  I'll take votes if anyone has a preference.


Saturday, December 29, 2012

And now it's time for another good idea, bad idea.


Whew, December has been a busy month.  Along with the usual seasonal parties and concerts, etc., we got to work extra shifts at work.  So on the Saturdays I wasn't working I was playing catch-up, not blogging.  Things have started to slow down now, and we got a 4 day weekend for Christmas, so I'm back to share with you one idea I'm pretty proud of... and another that didn't turn out quite so well.  

Good idea:

This doesn't really have anything to do with sustainability or healthy living (except that TOMS sells organic shoes, which I like) but I just thought it was an idea worth sharing, regardless of its relevance to the theme of this blog.

I had been wrestling with one of the great questions of life: whether or not it's okay to wear socks with TOMS.   A classic catch 22 scenario - should I look like a dork or have smelly feet?  The answer is neither!  You can have your socks and eat them too!  ...You know what I mean.

Instead of putting socks on your feet, you can put the socks on the insoles!  I pulled out the original insoles and use orthotic inserts because I work on my feet all day, which is what originally inspired me with the idea, but I suspect you could do this just as easily with the original insoles.  

I prefer this to no-show socks, because those usually don't stay in place for me and I find them uncomfortable.

Here's a handy dandy step-by-step graphic for you.  I simply put the sock on the insole upside down, so the hole faces down.  Then I put the insoles back in and ta daa!  The look of no socks, with the advantage of wash-ability and absence of odor!


Bad idea:

I've recently been learning about the virtues of activated charcoal.  Not the stuff you find at the bottom of your grill or on your overcooked steak, but the stuff that's sold as a supplement and is commonly used in water filters and poison control situations.  Activated charcoal has been purified and it has a high amount of surface area and is very porous, so it is highly ADsorbent.  This means it acts more like a magnet attracting substances to it, rather than dissolving substances in it (absorbent).  You can use it to whiten teeth, in facial scrubs, and to make mascara

I had been wanting to purchase some black eyeliner from 100% Pure for evening makeup looks, but I hadn't gotten around to in time to have some for my work Christmas party.  The day of the party, it occurred to me that if you could make mascara with activated charcoal (which I haven't tried yet, but is on my list), maybe you could make eyeliner!  So I opened a capsule and mixed it with some of my homemade moisturizer.  I applied with an angle brush, my usual method, and was quite happy with the look of it.  I headed off to my work party feeling pleased and slightly apprehensive.  I knew it wasn't a great idea to wear something in public that I hadn't tested around the house first, so I periodically rubbed under my eyes hoping to avoid the dreaded "raccoon eyes" and was hopeful that any crisis would be thus averted.

Alas, not so.  When I arrived home and looked in the mirror: no raccoon eyes.  Whew.  Then I noticed black flakes on my CHIN!  My first instinct was to frantically brush them away, so there is no picture for your enjoyment.  Fortunately I sat in the back at the party, the lights were rather dim, and I didn't mingle with very many people so I can laugh about it rather than feel terribly embarrassed.  When I do get around to attempting homemade mascara, I'll be sure to wear it around the house for several hours before I venture out.  : )


Saturday, November 3, 2012

DIY Dry Shampoo


I've been on quite a natural hair care journey.  I've read more crunchy blog posts about natural hair care than you can shake a stick at.  Where did that expression come from anyway?  Who are these people that shake sticks?  What sort of things do they shake them at?  I can't remember ever shaking a stick at anything.  Well, maybe a marshmallow on a stick over a fire...

Back to hair.  After a year of experimenting, I finally settled on shampoo and conditioner that I'm really pleased with, but now I'm going to talk about some of those days when I don't wash my hair.  I have discovered a dry shampoo recipe that I really like!  My hair is thin and fine and gets greasy really quickly.  I've over-shampooed for...ever, apparently.  Shampoo strips your hair of its natural oils, so your scalp freaks out and produces extra oil to make up for it, and it turns into a vicious cycle.  Supposedly, over time you can train your scalp to produce less oil by shampooing less frequently.  I used to shampoo every day, but about 7 or 8 months ago I started shampooing only every other day.  Perhaps my scalp produces less oil than it used to, but I'm still not happy with the way my hair looks the second day.  Dirty hair is one of my "things."  I'd typically rather leave the house with no makeup on than with unwashed hair.

Dry shampoo is a great way to stretch the amount of time between washings.  Back in my pre-crunch days, I used to use an aerosol dry shampoo.  It did the job, but I hated the smell, so I used it only in a pinch.  Post crunch, I tried several things I didn't like, starting with baking soda.  It performed acceptably, but because it's white, tended to make me look like I had graying roots.  Not okay.  Next, I read a book that suggested cocoa powder for brunettes.  I thought it sounded like a great idea but I ended up liking it even less than the baking soda.  The authors must not have been brunette.  Cocoa powder isn't as dark as you're probably imagining.  I think of it as dark because chocolate is dark, but cocoa powder is lighter and redder than chocolate.  Again, it performed acceptably, but noticeably stained my scalp a weird reddish color.  Not okay.  Then I think I read somewhere else about oatmeal ground into a powder then brushed out.  I succeeded only in looking like I had severe dandruff.  Really not okay.  I gave up for awhile.

Several months later, inspiration struck!   This happened probably around the time that I made my first batch of mineral veil.  It occurred to me to try the very same ingredients, but in different ratios.  For the mineral veil, I used arrowroot powder with a touch of cinnamon, but for the dry shampoo I use approximately:

          2 parts cinnamon
          1 part arrowroot powder

 I've been very happy with it!  It smells good, works well, doesn't make my scalp look weird, and I can leave the house feeling confident that my hair does not look greasy.

I store it in a glass spice jar, shake some out into my hands, rub them together, then rub them through my roots.  I let it sit for a minute, then brush through.  

This combination works for my hair color.  You might have to experiment with the ratio or the ingredients to find what works for you.  Straight baking soda or arrowroot might work very well for people with light hair.  For people with very dark hair, I'm not sure.  Allspice?  Comment if you have any ideas!


Mountain Rose Herbs is a great place to purchase ingredients. They sell high quality organic herbs and other products, and they are a fair trade company.  (Full disclosure, I do receive a small commission if you click the links on my blog and complete a purchase.

This post shared at Frugally Sustainable's Frugal Days, Sustainable Ways #81


For educational purposes only. This information has not been evaluated by the Food and Drug Administration.  This information is not intended to diagnose, treat, cure, or prevent any disease.