Showing posts with label vegetarian. Show all posts

Saturday, July 6, 2013

Naturally Radiant Skin Care - Make Your Own Moisturizing Oil


Everybody knows that "moisture is the essence of wetness, and wetness is the essence of beauty."  Name that movie.  Hint: mer-MAN! 

Now that you know how to naturally cleanse, tone, and deep clean your pores with an herbal steam, it's time to learn about the final step in a natural skin care system - moisturization.

When I first entered the world of homemade moisturizers, I tried lotions (or emulsions) and had pretty good success.  An emulsion is mixing two or more liquids together that don't like to be mixed together - like oil and water, for example.  Most emulsions are made with an emulsifier to make the process easier - commonly soy lecithin or even borax.  Emulsifiers aren't absolutely necessary, however, and I never used them. The process of emulsification is basically slowly pouring water into a combination of oils and melted beeswax while mixing with a blender or stick blender.  If you've ever tried to make homemade mayonnaise, it's like that.

The first homemade moisturizer I tried was a simple olive oil, beeswax, and water emulsion with some lavender essential oil so it didn't smell so olive-y.  It was simple and it worked well enough, but it tended to separate and left my skin feeling pretty greasy.

The second homemade moisturizer I tried was Frugally Sustainable's Non-Greasy Moisturizing Lotion.  It also worked quite well and didn't separate as much, but still left my skin feeling slightly greasy.  After I applied my translucent face powder, though, it balanced out and I felt like I had the perfect dewy glow.

Now after reading this blog post, I'm using moisturizing oil, and it's my favorite option so far!  It has several advantages over the emulsions.  First, you don't have to emulsify anything or worry about it separating later.  Second, you don't have to worry about refrigerating it or the water making the whole concoction go bad.  Third, I've actually found my skin to be less greasy after using only oil.  In fact, I think my skin feels like velvet after I use it, and once again, after I use my translucent face powder I have the perfect combination of velvety softness and dewy glow.

Moisturizing Oil is also great because it has several other uses.  It makes a great all natural eye makeup remover, a smoothing hair serum, and can even be added to homemade shampoo for extra moisturizing power. 

So, using oil as a moisturizer can be as simple as using one oil alone like grapeseed or jojoba (pronounced ho-HO-ba).  Both of these are lightweight, non-greasy, fast absorbing oils that mimic the sebum your skin naturally produces.  They are also both relatively inexpensive.  There are many other oils, however, that have extra age-fighting, dryness-combating, oil-cutting, or acne-busting properties, so I combined several oils to get the best of all worlds.

I used grapeseed and jojoba as a base and added in smaller amounts of several other oils.  Finally I added several drops of skin-loving essential oils.

Note: Never use oil on un-cleansed skin.  It can trap the dirt and oil in your pores, causing future unpleasantness.

Another note: A very little goes a long way.  If your skin feels greasy, you've used too much.  I keep mine in a dropper bottle, and about 4-5 drops is all you need.  This also means you get a lot of bang for your buck.


 Carrier oils good for dry or aging skin:
  • Grapeseed
  • Jojoba
  • Argan
  • Apricot Kernel (which smells scrumptious, by the way)
  • Avocado
  • Macadamia Nut
  • Sweet Almond
  • Hemp Seed
  • Sea Buckthorn (can temporarily stain skin, so use in small amounts)
  • Rosehip Seed (which goes rancid easily and should be kept refrigerated)
  • Emu
  • Vitamin E
 
Essential oils good for dry or aging skin:
  • Frankincense
  • Rose geranium
  • Rose
  • Cedarwood
  • Palmarosa
  • Roman Chamomile
 
 
Carrier oils good for oily or acne prone skin:
  • Grapeseed
  • Jojoba
  • Argan
  • Hazelnut
  • Sunflower
  • Tamanu
  • Sweet Almond
  • Hemp Seed
  • Borage Seed
  • Evening Primrose
  • Neem
  • Turmeric oil
  • Vitamin E oil
 
Essential oils good for oily or acne prone skin:
  • Lavender 
  • Peppermint
  • Lemongrass
  • Rosemary
  • Sweet basil
  • Bergamot
  • Tea Tree
  • Lemon
  • Juniper Berry
  • Roman Chamomile
  • Rose
  • Palmarosa
 
Mountain Rose Herbs is a great resource to learn more about the individual properties of these oils.  It's also a great place to purchase ingredients. They sell high quality organic herbs and other products, and they are a fair trade company.  (Full disclosure, I do receive a small commission if you click the links on my blog and complete a purchase.)

If you're not a DIY-er, or you're not up for a another project right now, I do have moisturizing oils available for purchase in my store.


For educational purposes only. This information has not been evaluated by the Food and Drug Administration.  This information is not intended to diagnose, treat, cure, or prevent any disease.


Tuesday, July 2, 2013

Naturally Radiant Skin Care - Deep Pore Cleansing Herbal Steam


At the end of a stressful week, pamper yourself with an herbal facial steam!  Facial steams are the best possible method for deep pore cleansing.  Moist heat hydrates skin, boosts circulation, brings oxygen to the facial area, and improves skin clarity.  Steam loosens debris and softens skin to help pores unclog and appear less prominent, and the herbs recommended below are rich in nutrients and aromatic oils that nourish and tone the skin.
  

Method:
 
After cleansing, boil 2-3 quarts of water in a large pot.  Add a handful or two of herb mixture, cover and simmer for a couple minutes, then remove from heat.  Place at a level you can comfortably sit and lean over the pot.  Cover your head and the pot with a towel, breathe in the delicious aroma, and let your pores open and drink in the nourishing plant oils for 5 - 8 minutes. Follow with a cold water rinse, then herbal toner, and finally moisturize.


Herbs for oily or acne prone skin
  • chamomile
  • comfrey
  • calendula
  • lemongrass
  • lavender
  • rosemary
  • sage
  • witch hazel leaves
  • rose petals
  • strawberry leaves
  • raspberry leaves
  • blackberry leaves
  • eucalyptus leaves if you specifically want to address acne
  • licorice herbs, which include anise seed, fennel or licorice root, help rid the skin of impurities   
Note:  If skin is severely broken out or inflamed avoid steaming, as steam may aggravate these symptoms.


Herbs for dry or aging skin

  • fennel seeds
  • rosemary leaves
  • rose petals
  • lavender
  • peppermint leaves
  • chamomile
  • calendula
  • comfrey root
  • comfrey leaves
  • comfrey flowers
  • borage flowers
  • dandelion root
  • licorice root
  • marshmallow root

Note: To prevent over-drying, don't steam your face for more than five minutes, and use the treatment no more than once a week.


If you're wondering where to get these ingredients, Mountain Rose Herbs sells high quality organic herbs and other products, and they are a fair trade company.  (Full disclosure, I do receive a small commission if you click the links on my blog and complete a purchase.)

If you're not a DIY-er, or you're not up for a another project right now, I do have herbal steams available for purchase in my store.


This post shared at Frugally Sustainable's Frugal Days, Sustainable Ways #79, Tilly's Nest Down Home Blog Hop #44, and Sunny Simple Life's From the Farm Blog Hop #40

For educational purposes only. This information has not been evaluated by the Food and Drug Administration.  This information is not intended to diagnose, treat, cure, or prevent any disease.


Bulk organic herbs, spices and essential oils. Sin

Monday, June 17, 2013

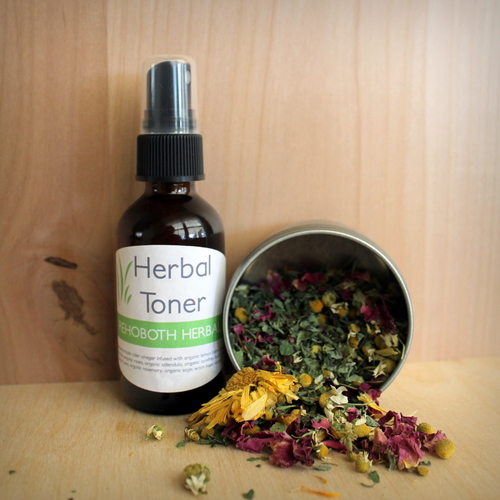
Naturally Radiant Skin Care - How To Make an Herbal Toner

I mentioned in my last post about cleansing grains that I recently celebrated my thirty fifth birthday, but I feel like my skin has never looked better.  I attribute this to switching to homemade products made with natural, high quality ingredients.  I never had really bad skin, but I never would have said I had really good skin either.  I was constantly battling a blemish or six.  Now I rarely get blemishes anymore, my skin is smoother, my complexion is clearer and brighter, and I'm wearing less makeup than ever before.  Most days I skip foundation and concealer entirely and just use a bit of my homemade translucent face powder.

Part of my new skin care regimen is an herbal toner or astringent.  An astringent substance is something that shrinks or constricts body tissues.  In facial care, toners or astringents are used after cleansing to remove all traces of dirt and oil, tighten pores, balance pH, and prepare skin for moisturizing.

Many herbs have astringent properties.
  • lemon balm
  • chamomile
  • roses
  • calendula
  • comfrey leaf
  • lemon peel
  • rosemary  
  • sage
  • peppermint
  • yarrow
  • lavender
I used a formula found in Rosemary Gladstar's Herbal Recipes For Vibrant Health, so I won't share it here.  If you're interested, feel free to look it up.  I've found this book to be a good resource.  If you'd like to experiment with your own formula, any of the herbs listed above will be effective.

When you've come up with an herb mixture you'd like to try,  then you will make a tincture.

1. Fill a wide mouth mason jar about 1/2 to 3/4 full with herb mixture.  If using dried herbs, keep in mind that the herbs will swell when liquid is added, so be sure to leave enough room.
2. Cover the herbs by about 2 inches with apple cider vinegar (organic, raw ACV is ideal) or witch hazel.
3.  Place the lid on the jar and shake.
4.  Put the jar in a warm location, a sunny window is a good spot, and steep for 2 - 4 weeks, shaking at least once daily.

5.  Strain the mixture through a fine mesh sieve lined with cheesecloth.  Squeeze the cheesecloth to get out all the herby goodness you can.

6.  You want your final ratio to be about 1/2 to 1 part vinegar to 1 part witch hazel, so if you tinctured in witch hazel, add vinegar.  If you tinctured in vinegar, add witch hazel.  If you don't have witch hazel, add distilled water. 
7.  Add skin loving essential oils like lavender, rose geranium, palmarosa, or carrot seed, if desired.  If you have oily skin, rosemary and peppermint are good options.
8.  Hydrosols like rose or lavender can also be added or substituted.
9.  Label and date the bottle.
 
Toner should stay good for up to a year.  Keeping it from heat and light will prolong its life.

If you're wondering where to get these ingredients, Mountain Rose Herbs sells high quality herbs and other products, and they are a fair trade company.  (Full disclosure, I do receive a small commission if you click the links on my blog and complete a purchase.)

If you're not a DIY-er, or you're not up for a another project right now, I do have herbal toner available for purchase in my store.


This post shared at Frugally Sustainable's Frugal Days, Sustainable Ways #78, Sunny Simple Monday, Monday Funday, and
From The Farm Blog HopMore the Merrier Monday


For educational purposes only. This information has not been evaluated by the Food and Drug Administration.  This information is not intended to diagnose, treat, cure, or prevent any disease.


Bulk organic herbs, spices and essential oils. Sin


Sunday, June 16, 2013

Naturally Radiant Skin Care - A Recipe For Cleansing Grains

I recently celebrated my *cough* thirty fifth *mumble* birthday.  The ironic thing is, I honestly feel like my skin has never looked better.  It's not so much about what age I look (people have guessed my age as younger for years) but my skin is clearer, smoother, brighter, and more radiant than it has ever been before.  I believe it's because I have switched to natural products that I make myself from high quality, organic ingredients.

When I think back to all the times I spent in the department store aisle mentally agonizing over which of the myriad brands or products contained the silver bullet that would put a stop to my breakouts and dry skin, I can only shake my head.  The answer is none of them!  I used to think that companies had teams of scientists whose purpose in life was to figure out how to make my skin miraculously better.  Now I realize that, more accurately, they have teams of marketers whose jobs are to more effectively part me from my money in exchange for what are mostly cheap, harsh, synthetic fillers and preservatives whose names I can't even pronounce. 


How was it ever okay to unquestioningly rub that on my face?  I get frustrated with my former self, but these days I try not to put anything on my body that I can't pronounce or wouldn't put in my mouth.  Now I alternate between two natural skin cleansers that I love.

The first is soap.  Real soap.  Not Dove bars or any other kind of soap free bar.  I've used my own homemade soap, Grandma's Lye Soap, and Dr. Bronner's Castile soap in bar form, and I've been happy with all of them.  In fact, since switching to real soap, my skin is better head to toe.  The thing to be careful about when shopping for soap, though, is to watch out for synthetic fragrances.  Many soaps are made with fragrance oils that are not so good for us.

Soap is particularly good for deeper cleansing and makeup removal, but now I mostly use cleansing grains.  The advantage of cleansing grains is that they not only cleanse, but they nourish and exfoliate as well.  It's like a healthy meal for your face!  This recipe is based on a recipe in Rosemary Gladstar's Herbal Recipes For Vibrant Health.


The formula:

16 parts white clay
8 parts finely ground oats
2 parts finely ground almonds
1 part finely ground lavender
1 part finely ground roses
1 part rice powder (I use organic brown rice baby cereal)


The breakdown:

White clay or kaolin clay is the mildest of all clays and is suitable for sensitive skin. It helps stimulate circulation to the skin while gently exfoliating and cleansing it. It does not draw oils from the skin, so it can also be used on dry skin types without negative results.

Oats and almonds nourish and exfoliate.  Oats are also emollient, helping to soothe and moisturize the skin.

Lavender and roses have mild astringent properties that tighten and tone skin, and the plant oils contain antioxidants and are commonly believed to have regenerative properties.  Lavender is antimicrobial, helping to clean the skin.

Rice enzymes smooth skin and accelerate cell renewal.


To use, simply mix about 1/2 tsp with water and gently massage into your skin, then rinse with warm water.  Grains may also be used as a mask by mixing with milk, honey, yogurt, or a liquid of your choice and leaving on for several minutes.  I keep mine in a spice bottle with a shaker top in the shower, and I find that it's super convenient that way.

The beauty of making your own products is that you know everything that goes in them, you control the quality of the ingredients, and you can customize them to suit your individual needs.  There's not necessarily anything magic about this particular formula.  Use ingredients you have on hand, substitute or experiment with additions like cornmeal, poppy or chia seeds, seaweeds or other herbs.

If you're wondering where to get these ingredients, Mountain Rose Herbs sells high quality herbs and other products, and they are a fair trade company.  (Full disclosure, I do receive a small commission if you click the links on my blog and complete a purchase.)

If you're not a DIY-er, or you're not up for a another project right now, I do have these cleansing grains available for purchase in my store.

What about you?  What do you use to naturally cleanse your skin?


For educational purposes only. This information has not been evaluated by the Food and Drug Administration.  This information is not intended to diagnose, treat, cure, or prevent any disease.


 This post shared at: frugallysustainable.com's Frugal Days, Sustainable Ways #77, and  


From The Farm Blog HopMore the Merrier Monday


Bulk organic herbs, spices and essential oils. Sin

Sunday, March 24, 2013

Locks au Naturale - Color Wonderful Part 1, Introduction to Henna

Nothing new to report on the house, so back to hair.

This week I'm going to introduce you to henna.  Reader, meet henna.  Henna, reader.

Next time I'll get into the practical nuts and bolts and how to's and befores and afters.  Ready?  Okay.

The Anne of Green Gables movies are among my top 5 favorite movies of all time, and every time I watch them it is at this precise moment that I know in my heart I was meant to be a redhead.


Perhaps it's also because of my Scottish roots, but I always wanted to be a redhead, marry a redhead, and have redheaded babies. 


Alas, God didn't get the memo.  I do tend toward reddish highlights, but my natural hair color is mouse brown.  Over the years, I have dyed my hair every color from blonde to black and even blue, but red was the color I always tried the most...every time I watched Anne. It was also the color that always disappointed the most.  I would love it for about 2 days, then it would fade to brassy, ugly lifelessness and turn into a vicious cycle of spending money, dying, frying, and fading.  I put a stop to it a long time ago, embraced the mouse, and have rarely looked back.  

Recently, however, I stumbled across henna.  I had heard of it before, but it was more a buried memory than something on my radar.  I was intrigued and started to read.  For me, one of the most appealing things about it wasn't even about color, but that it thickens and conditions your hair.  The more I read the more I wanted to try it.  Not only is it not toxic and scary, but it's actually really good for your hair and scalp!  And I could try being a redhead again!  So:


Pros of henna:
  •  All natural and plant based  
  •  Nourishes and heals scalp
  •  Adds strength and shine to hair, thickens and improves texture
  •  Lovely color options from light red to brown and black (using combinations of henna, indigo, and cassia obviata)
  • Option to treat hair for benefits and not color it using cassia obviata or "blonde henna"
  •  Ability to custom mix colors - endless options!
  • Doesn't fade like conventional hair color 

Cons of henna:
  • Time consuming and messy
 
Other notes:
  • Henna will not lighten your hair.
  • Henna will dye your hands, clothes, sink, etc.
  • Results vary according to time left in and condition of hair.

So far I've tried a subtle auburn and neutral henna and been very happy with both.  Next week I'm going to try a brighter red, and I'm a little nervous, but I will photo document the process and results for you.  Fingers crossed!


Saturday, October 20, 2012

You need to know about this cosmetics company!! (And a mini progress report.)

I'm in LOVE, I'm in LOVE, and I don't care who knows it!!!!!!!  ...With a cosmetics company.  


I usually experience a range of emotions when I realize something else in my life needs to change: a twinge of annoyance that effort will be required of me, a healthy dose of exasperation that I've been duped by the lure of marketing and the ease of convenience yet again, a bit of anticipation for the hunt (I like research),  and ultimately a cozy, satisfying feeling that I'm doing something better for my health.

So I realized that most of my makeup had to go.  Preservatives, synthetic chemicals, phthalates, parabens, petroleum, carcinogens...yuck.  The first change I made was a mineral veil/finishing powder replacement that I made myself and was very happy with.  You can read about that here.  Making everything else seemed a little out of my reach, though.  Maybe someday, when I have more time **scoff** I'll get into making my own cosmetics, but for now I need something ready made.  It took me several research attempts to find something that didn't disappoint when I read the list of ingredients.  I figured I'd just go with Bare Minerals...which I think is a good company and a good option.  But then I Googled one more time and found 100% Pure.  Not only was I not disappointed, I was ecstatic!!!  From their website:


100% Pure are the first and only cosmetics colored from antioxidant rich fruit and vegetable pigments. While other color cosmetics are colored with either synthetic dyes or minerals, only 100% Pure Cosmetics are colored with fruit and vegetable pigments (patents pending)! All the antioxidants and vitamins are in the pigments, so you will be applying all the healthy nutrients of the fruits directly on your skin.


Not only are there no harmful ingredients, but you get the benefit of antioxidants and quality moisturizers!!!  I can read the ingredients list and basically recognize and understand everything in it!  They offer a full range of makeup and skin and hair care products.  I recommend reading the FAQ page to learn more about why this company is awesome.  I was tempted to quote the entire thing, but I'll just link it.  You're welcome.

It was a gradual process, but I have now switched almost all of my makeup to this brand, and I couldn't be happier!  So far I have purchased eyebrow powder gel (huh? but I like it), eyeshadow, mascara, cheek tint and lip glaze.  Next on my list is eyeliner and lip gloss.  Another thing that makes this company awesome is their samples and gifts with purchase.  Because of this I have also gotten to try their body cream in several scents, a body scrub, face wash/mask, coffee bean eye cream, and super fruits reparative cream.    So far, I have pretty much loved every product I tried.  They almost all smell aMAZing...the body creams especially are fruity heavenliness!!  To me, the coffee bean eye cream smells exactly like buttered popcorn Jelly Bellies taste...weird, but kind of yummy.  Even the mascara smells good!  My sole product complaint is that the mascara tends to give me raccoon eyes, so I have to be vigilant against smudge.  It can also be tricky to pick out colors on a computer screen.  Finally, their products are not drugstore cheap, but you get what you pay for.  Their products are quality, and they're made in the US.  I'm happy to pay more for a product I'm this excited about.  In the future I may review individual items, but for now I just want you to know that this company exists!!


Now for the mini update.  We are still looking for land - with or without home, though not as intensely.  We are still seeking the Lord for where and when.  It's been almost a year.  This entire process started when we celebrated my mom's birthday last year, which we will do again on Sunday.  It has not been an easy process.  There are a lot of opinions, a lot of variables, and a lot of obstacles.  We've asked a lot of questions and had a lot of conversations.  "Did God really say...?"  "I'm running out of steam."  "I feel like I'm working harder than anyone else at this."  "I don't know if I want to do this anymore."  "I felt pushed out of the process."  "I'm considering just doing this on my own."  "Should we just wait until...?"  "But there will always be something to 'just wait until' for."  "Are we being too picky and delaying obedience because it's hard, or is it just not the right time?"  And so much more.  I believe all of that has been good practice, though.  Multi-generational living and working together is not easy, but we believe it's worth it.  The Lord continues to refine our vision as we continue to learn.  I'm grateful for His wisdom, His sovereignty, His leading and His timing.  And a little impatient sometimes.  But mostly just grateful.


Friday, September 28, 2012

Roasted Veggie Enchiladas


 I want to eat more vegetables - more fresh, locally grown, in season vegetables.  I'd like to grow them myself, but I'm finding it hard to do that while working full time and teaching piano lessons and leading worship... etc.  Confession: everything in my summer garden failed except one jalapeno plant.  And I haven't planted my fall/winter garden yet.  So what's a girl to do?  Look for a CSA!  What's that you say?  CSA stands for community supported agriculture.  You pay a local farmer a fee and get a "share" of produce.  Usually you join for a season, but I was excited to find one that lets you buy by the week.  I wasn't quite ready to commit.  I picked up my first bag last night...about 5 miles from my house.  For $20, I got a delicious cantaloupe,  beets with greens, sweet potato greens, spaghetti squash, butternut squash, eggplant, okra, and sweet peppers.  I was thrilled!  If you're interested in finding a CSA, check out Local Harvest.

I think I've only eaten eggplant once, and I don't know that I've ever eaten beets...let alone cooked with them, but I remembered reading a blog post awhile back about turnip enchiladas and the wheels started to turn.  I spent the rest of the evening reading food blogs and researching.  Then I went to bed and dreamed about vegetables all night.  Seriously.

Now I'm going to share with you the most ambiguous recipe ever...because I completely made it up.  I started by chopping the eggplant, peppers, and beets (not pictured, because they didn't look as pretty and I hadn't gotten them out of the fridge yet).


Then I tossed them with olive oil and salt and pepper and roasted them in the oven at 400° for approximately 30 minutes, until soft, tossing occasionally.


While the veggies roasted, I made enchilada sauce from scratch and wilted the beet greens.  Again, here comes the ambiguity.  I heated some olive oil in a pan, added some flour, and whisked until lightly browned.  I didn't have tomato sauce, so with my immersion blender I blended some chopped tomatoes until smooth (we buy Pomi chopped tomatoes because they're non GMO and BPA free), then added chili powder, cumin, oregano and garlic powder and poured it into the pan with the oil and flour mixture.  I added some water and a couple bouillon cubes and let it simmer, whisking occasionally.   

Then I washed the beet greens and heated them in a second pan until wilted. 


In the meantime, my nephew Samuel got creative with the okra and peppers on the kitchen table. 


When the veggies were soft, I pulled them out of the oven, removed the beet skins and chopped the bigger chunks into smaller pieces.


I poured some enchilada sauce in the bottom of my 9x13 glass baking dish (I'm avoiding aluminum and non-stick - trying to use glass or cast iron when possible, and dreaming wistfully of pricey enameled cast iron), then tossed the vegetables and greens with the remaining sauce, reserving some for the top.  I placed some veggie mixture into whole wheat tortillas, rolled them, and laid them in the pan.


When the veggie mixture was used up, I poured the remaining sauce on top, covered it with cheese, and baked until the cheese was melted.


Then we topped it with fresh, homemade salsa, ate it, and it was delicious.   


On a side note, I tasted the roasted beets and eggplant out of the oven, and the roasted beets were a revelation.  The eggplant was pretty good too.

On another side note, if people are interested, I might try to make a more specific printable of the recipe.